Summary
The Bitaxe Gamma 601 is a compact and efficient Bitcoin miner powered by the BM1397 chip. To help beginners start mining smoothly, this guide provides a complete step-by-step setup tutorial, including both computer setup and mobile setup, based on actual operation videos.
By following this tutorial, you will learn:
How to connect Bitaxe Gamma 601 to Wi-Fi
How to access the control dashboard
How to configure mining pool settings
How to check IP address & confirm the miner is working properly
(Overclocking and tuning will be in a separate article.)
This article provides a text and image tutorial. All detailed video tutorials are located at the bottom of the article; simply open the video link to view them.
Before You Start
What You Need
| Item | Requirement |
|---|---|
| Wi-Fi Router | Must support 2.4GHz (Not 5GHz only) |
| Device | PC or mobile phone |
| Power | USB-C power supply |
| Mining Pool Account | Any pool supporting solo/stratum |
PC Setup Guide for Bitaxe Gamma 601
Step 1 — Confirm your computer is connected to a 2.4GHz Wi-Fi network

1. Click the Wi-Fi icon at the lower right of your Windows desktop
2. View your current network band
3. Make sure your device is connected to 2.4G
4. If it is connected to 5G Wi-Fi, manually switch to the 2.4G network
Tips: Why this matters: Bitaxe Gamma 601 only supports 2.4GHz Wi-Fi.
Step 2 — Connect to the Bitaxe Wi-Fi signal
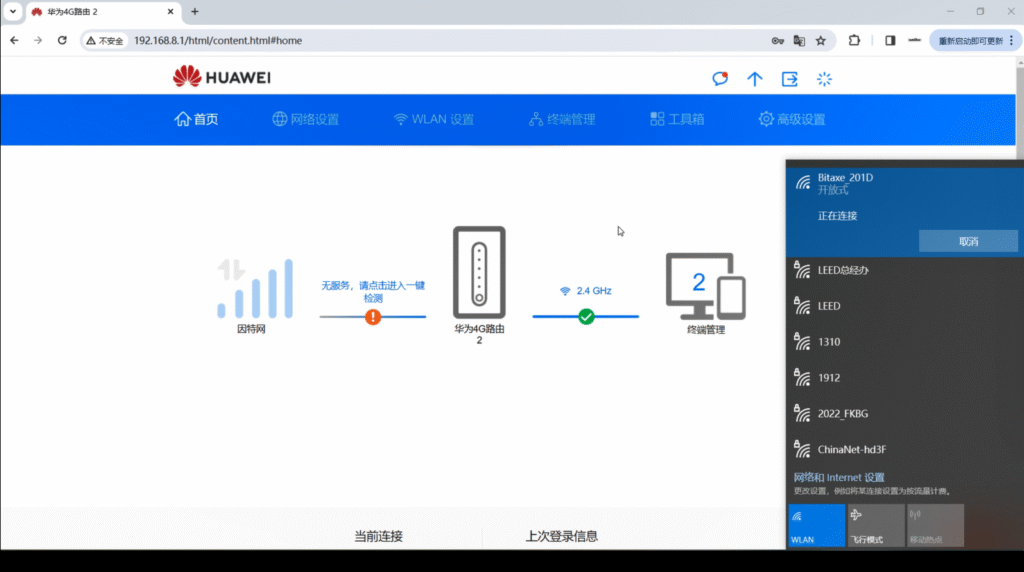
Open your Wi-Fi network list
Locate a network named similar to: Bitaxe_XXXXXX
Click Connect (no password required)
Wait 5–10 seconds until connection completes
Step 3 — Find the Bitaxe local IP address
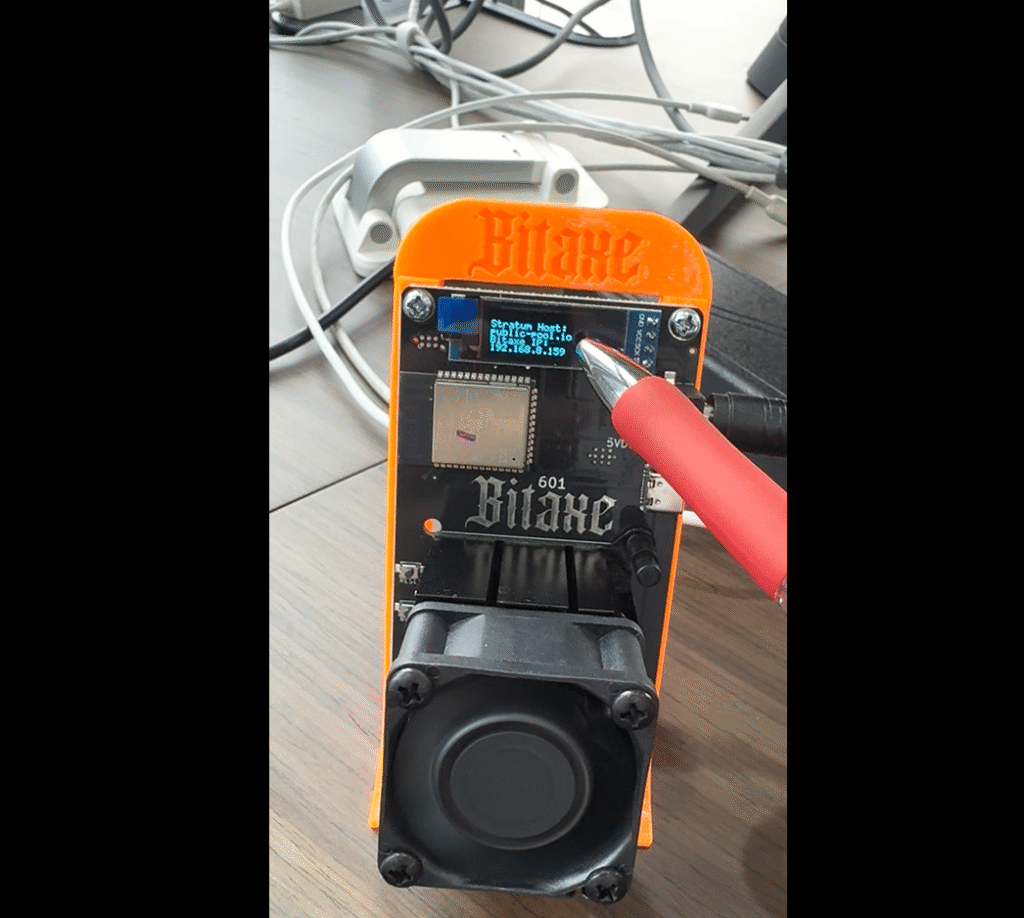
Log into your router admin page (usually 192.168.0.1 or 192.168.1.1)
Go to Device List / DHCP Client List
Look for a device named Bitaxe
Copy its assigned IP address (example: 192.168.1.120)
Tip: If you cannot find it, refresh or disconnect & reconnect Wi-Fi.
Step 4 — Open the Bitaxe Dashboard

Paste the IP address into your browser’s address bar.
Access the Web UI control interface.
The page will display panels showing miner status, frequency, voltage, hashrate, mining pool configuration, etc.
Congrats!! — your PC setup is complete ! ! !
Mobile Setup Guide for Bitaxe Gamma 601
Step 1 — Check if your phone is using 2.4GHz Wi-Fi
Open Settings → Wi-Fi
Tap the connected network to view details
Confirm that you are connected to 2.4GHz Wi-Fi
Tip: If you are using 5G, please switch to Wi-Fi and manually select 2.4G.
Step 2 — Connect the phone to the Bitaxe Wi-Fi

- Open Wi-Fi scan list
- Tap Bitaxe_XXXXXX
- Connect directly, without password. Your browser will automatically redirect after a successful connection (if it does not redirect, please continue to the next step).
Step 3 — Configure Wi-Fi & Mining Pool
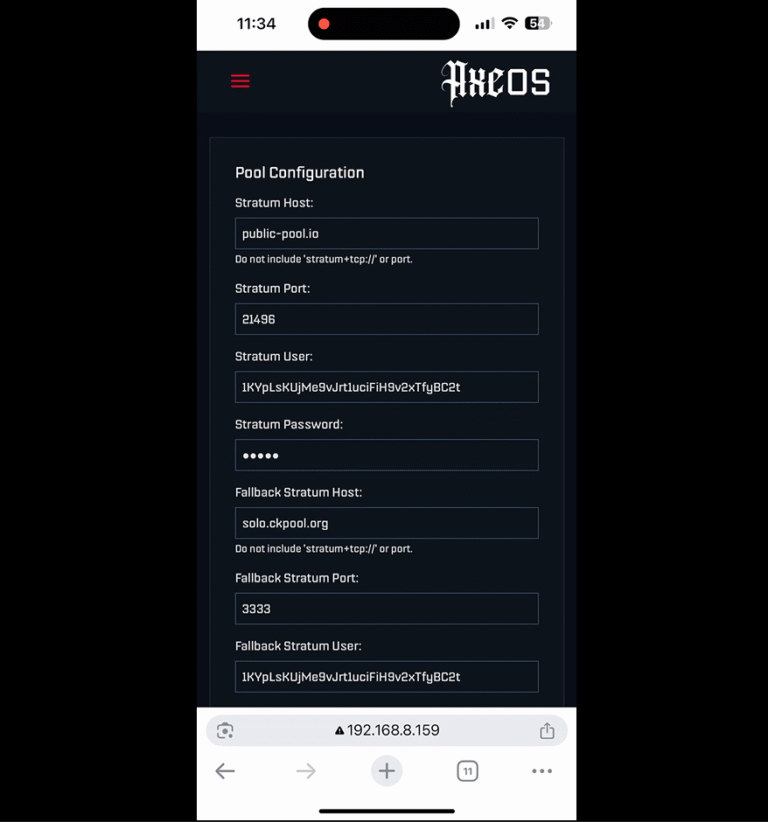
Open browser → input http://192.168.4.1
Click Wi-Fi Setup
Choose your home 2.4GHz Wi-Fi network
Enter Wi-Fi password
Click Save and Reboot
Miner will restart and reconnect to home network
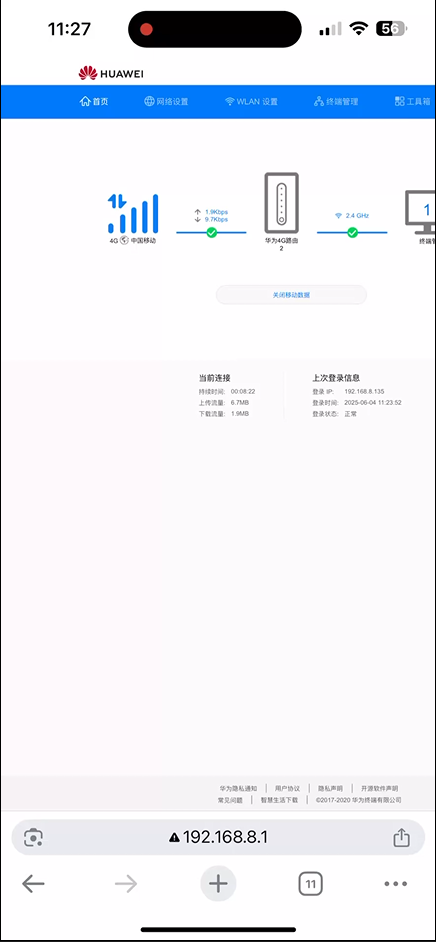
Verify Mining Status
Once Bitaxe is connected to the internet:
Mining will start automatically
Hashrate will gradually increase
You can access your router’s admin panel to find the IP address again
Enter the IP address to view real-time hashrate
Default hashrate is approximately 550–600 GH/s, power consumption is approximately 14–17W
Troubleshooting Tips
| Problem | Solution |
|---|---|
| Cannot detect Bitaxe Wi-Fi | Unplug power for 10 seconds |
| Cannot access IP | Refresh router device list |
| Hashrate fluctuates | Improve cooling or Wi-Fi signal |
| Firmware stuck / unstable | Long press Reset for 10 seconds |
What’s Next
Next Step: Overclocking Bitaxe Gamma 601
If you want to improve hashrate beyond stock performance (e.g., 650–750 GH/s) with safe adjustments to frequency and voltage…
Read next article:
Best Bitaxe Gamma 601 Overclock Settings & Tuning Guide: Best Bitaxe Gamma 601 Overclock Settings & Tuning Guide
Conclusion
You have now successfully:
- Connected and configured Bitaxe Gamma 601
- Set up Wi-Fi and mining pool on PC & mobile
- Started mining with real-time monitoring